.NET gotcha: number validation and when unicode attacks!

Imagine you're working with .NET and have some numeric input with a specific format that you need to validate and convert the number portion to do something interesting with. You decide to tackle this using regular expressions.

You get to work, quickly constructing a pattern using the \d metacharacter to match digits, then use int.Parse on the match. Everything checks out, your unit tests pass, and you deploy your app. You're a regex ninja!

Fast forward and you start noticing errors being logged around your regex. Specifically, exceptions are being thrown on the int.Parse portion. Surprised, you think, "What?! That's impossible! The regex is solid. It matches numbers, so how could int.Parse possibly fail?"

Well, the hint is in this post's title. Consider this snippet:

string input = "42";
string pattern = @"^\d+$";
Match m = Regex.Match(input, pattern);
if (m.Success) 
{
    int num;
    bool result = int.TryParse(m.Value, out num);
    Console.WriteLine("Matched number: {0} -- Parsed: {1}", input, result);
}
else
{
    Console.WriteLine("Invalid number: {0}", input);
}

// Matched number: 42 -- Parsed: True

Simple, right? To get this to fail let's pass in some Arabic numbers:

string input = "\x0664\x0662"; // Arabic #42: ٤٢

// Matched number: ٤٢ -- Parsed: False

Notice that the output indicates that the Arabic numbers were valid. The regex matches but int.TryParse fails. In the scenario I described earlier we used int.Parse, confident that we would have a valid number, but in this example int.Parse will throw a FormatException.

The reason is \d matches more than just 0-9. According to MSDN (emphasis mine):

\d matches any decimal digit. It is equivalent to the \p{Nd} regular expression pattern, which includes the standard decimal digits 0-9 as well as the decimal digits of a number of other character sets.

If you normally validate numbers using ^\d+$ it clearly isn't enough. There are two ways around this, to limit the valid digits to 0-9:

  1. Use [0-9] instead. It is explicit and will not accept unicode decimal digits.
  2. Continue using \d and add RegexOptions.ECMAScript to use ECMAScript-compliant behavior. This option makes \d equivalent to [0-9].

An updated snippet with the ECMAScript option follows:

string input = "\x0664\x0662";
string pattern = @"^\d+$";
Match m = Regex.Match(input, pattern, RegexOptions.ECMAScript);
// ... same code as before ...

// Invalid number: ٤٢

Note, there are similar issues when using \w where it isn't limited to ASCII characters. Refer to ECMAScript Matching Behavior. In addition, the same issue applies to Char.IsDigit and Char.IsLetter.

To demonstrate:

string input = "\x0664\x0662";
Console.WriteLine(Char.IsDigit(input[0])); // True

Next time you reach for \d, keep these issues in mind! Typically someone will opt for \d thinking it's shorter while being unaware of these implications.


Regextra: helping you reduce your (problems){2}

I'm a fan of regular expressions and tend to be the go-to guy on teams when it comes to (concoct|conjur)ing patterns. I've also answered a good amount of regex related questions on StackOverflow.

One of the questions that frequently gets asked is how to construct a pattern that enforces passphrase/password validation with a number of criteria. These are the rules you typically see when signing up on the majority of websites: your password must include at least 1 uppercase letter, 1 lowercase letter, 1 digit, 3 oz. Unicorn tears, and 16 scruples of Fluxweed... you get the idea.

Other questions revealed a host of handy techniques that I wanted to capture, such as splitting strings and including the delimiters, trimming whitespace, and formatting camel case values.

Enter Regextra

A little over a year ago I started working on a library to address these problems and capture useful solutions. I've been working on it on and off and recently devoted much more time to it to add some finishing touches before releasing it on NuGet. Without further ado, I'm finally happy to reveal it!

Regextra (pronounced "Rej-extra") is an open-source .NET library written in C#. It's well tested, with over 200 unit tests.

Currently, the library includes the following features:

  • Passphrase Regex Builder
  • Named Template Formatting
  • Useful regex/string methods

Over time I hope to add other useful features, and would love to hear any community feedback on what the library accomplishes today. The goal of this project was to address common scenarios, however that's not to be confused with amassing all sorts of patterns. This is more of a helpful utility, not an encyclopedia of patterns.

Getting Started

  • Check out the wiki
  • Visit the project's demo site for a chance to try out some client-side validation (using the patterns produced by the PassphraseRegex builder)
  • The extensive test suite is worth a glance

Regextra is available via NuGet:

PM> Install-Package Regextra

Passphrase Regex Builder

A common question I've seen on StackOverflow is how to write code that enforces strong passphrase or password rules. Popular responses tend to tackle the problem by using a regex with look-aheads. I've seen this so much that I decided to have fun writing a solution that allowed people to produce regex patterns that would enforce such rules.

Example usage

The following code generates a pattern to enforce a password of 8-25 characters that requires at least two lowercase letters in the range of a-z and numbers excluding those in the range of 0-4 (i.e., numbers in the 5-9 range are acceptable).

var builder = PassphraseRegex.With.MinLength(8)
                                  .MaxLength(25)
                                  .IncludesRange('a', 'z')
                                  .WithMinimumOccurrenceOf(2)
                                  .ExcludesRange(0, 4);

PassphraseRegexResult result = builder.ToRegex();

if (result.IsValid)
{
    if (result.Regex.IsMatch(input))
    {
        // passphrase meets requirements
    }
    else
    {
        // passphrase is no good
    }
}
else
{
    // check the regex parse exception message for the generated pattern
    Console.WriteLine(result.Error);
}

Refer to the PassphraseRegex wiki for further details and examples.

Template Formatting

Template formatting allows you to perform named formatting on a string template using an object's matching properties. It's available via the static Template.Format method and the string extension method, FormatTemplate. The formatter features:

  • Nested properties formatting
  • Dictionary formatting
  • Standard/Custom string formatting
  • Escaping of properties
  • Detailed exception messages to pinpoint missing properties
  • Great performance (in part thanks to FastMember)

Example usage

var order = new
{
    Description = "Widget",
    OrderDate = DateTime.Now,
    Details = new
    {
        UnitPrice = 1500
    }
};

string template = "We just shipped your order of '{Description}', placed on {OrderDate:d}. Your {{credit}} card will be billed {Details.UnitPrice:C}.";

string result = Template.Format(template, order);
// or use the extension: template.FormatTemplate(order);

The result of the code is:

We just shipped your order of 'Widget', placed on 2/28/2014. Your {credit} card will be billed $1,500.00.

Refer to the Template wiki for further details and examples.

RegexUtility Class

This static class features a couple of helpful methods, such as:

  • Split Methods

    • Split
    • SplitRemoveEmptyEntries
    • SplitIncludeDelimiters
    • SplitMatchWholeWords
    • SplitTrimWhitespace
  • Formatting Methods

    • TrimWhitespace
    • FormatCamelCase
  • Named Groups Conversion Methods

    • MatchesToNamedGroupsDictionaries
    • MatchesToNamedGroupsLookup

Split and Include Delimiters

string input = "123xx456yy789";
string[] delimiters = { "xx", "yy" };
var result = RegexUtility.SplitIncludeDelimiters(input, delimiters);
// { "123", "xx", "456", "yy", "789" }

Combining Split Options

string input = "StackOverflow Stack OverStack";
string[] delimiters = { "Stack" };
var splitOptions = SplitOptions.TrimWhitespace | SplitOptions.RemoveEmptyEntries;
var result = RegexUtility.Split(input, delimiters, splitOptions: splitOptions);
// { "Overflow", "Over" }

Trimming Whitespace

var result = RegexUtility.TrimWhitespace("   Hello    World   ");
// "Hello World"

FormatCamelCase

Formats PascalCase (upper CamelCase) and (lower) camelCase words to a friendly format separated by the given delimiter (space by default).

It properly handles acronyms too. For example "XML" is properly preserved when given an input of "PickUpXMLInFiveDays". The result is "Pick Up XML In Five Days".

RegexUtility.FormatCamelCase("PascalCase")        // Pascal Case
RegexUtility.FormatCamelCase("camelCase42", "_")  // camel_Case_42

Matches To Named Groups Dictionaries

Returns an array of Dictionary<string, string> of each match with the named groups as the keys, and the group's corresponding value.

var input = "123-456-7890 hello 098-765-4321";
var pattern = @"(?<AreaCode>\d{3})-(?<First>\d{3})-(?<Last>\d{4})";
var results = RegexUtility.MatchesToNamedGroupsDictionaries(input, pattern);

This code returns the following result:

Named Groups Dictionaries

Refer to the RegexUtility wiki for further details and examples.

Check it out, Feedback Welcome

Regextra's source is on GitHub, and you can grab it from NuGet.

Please try it out and let me know what you think. Feedback is welcome, so feel free to leave comments or open issues.


Creating an AngularJS reset field directive

Do you know those helpful little X icons that appear in form fields as you're typing? The ones that you click on to clear the entire text entry? I decided to build an AngularJS directive called resetField to do just that, with the additional goal of clearing the underlying ngModel.

If you're eager to grab the code or check out the demo, here you go:

Some browsers include this feature out of the box. IE10+ does for text related input elements, and WebKit browsers might add icons for input types of search. You could write a directive that detects the native support and keeps it (by returning and doing nothing), as in the case of IE10+, or opt to apply your directive to all browsers and disable any native functionality. I opted for the latter since it keeps the look and feel consistent across browsers. Either way, you would have to write code to detect the feature, or CSS to disable it.

The following list covers my desired behavior for this feature:

  • Limited to input elements with types that make sense to reset (mainly text fields that get no special browser control appearance)
  • Limited to elements using ngModel
  • Hide the built in clear field icon for IE10+ that's applied to input elements
  • Hide the built in WebKit search cancel icon that's applied when type="search" is used
  • Icon appears inside the textbox
  • Icon visibility is dependent on the input's content (hidden when empty, otherwise visible)
  • Icon appears when the input gains focus and it isn't empty
  • Icon disappears when the input field loses focus
  • Add some CSS3 Animations with ngAnimate

To get an idea of how this would look I began with an input field, followed by a Font Awesome icon. I added CSS to right-align the icon and gave the field some padding so text wouldn't clash with the icon. Handling the built-in WebKit and IE10+ icons was a matter of disabling the appropriate styles by using the relevant CSS pseudo-classes on our selectors. This CSS covers most of the style related items on my list, except for animations (I'll get to that later).

/* prevent text from appearing underneath the icon */
input[reset-field] {
  padding-right: 19px;
}

/* hide the built-in IE10+ clear field icon */
input[reset-field]::-ms-clear {
  display: none;
}

/* hide cancel icon for search type */
input[reset-field]::-webkit-search-cancel-button {
  -webkit-appearance: none;
}

/* icon styles */
input[reset-field] + .fa {
  position: relative;
  right: 19px;
  color: #C0C0C0;
  cursor: default;
}
<!-- head content -->
<link href="//netdna.bootstrapcdn.com/font-awesome/4.0.3/css/font-awesome.css" rel="stylesheet">

<!-- body content -->
<input type="text" reset-field></input>
<!-- the icon will be added by the directive and is shown here for clarity -->
<i class="fa fa-times-circle"></i>

That should yield something similar to this: Reset field icon appearance

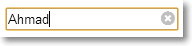
The idea is for an input element to use the reset-field directive, which will add the icon next to the element automatically. Next, I needed a way to toggle the icon's visibility. I also wanted the icon to be clickable to trigger the reset. With these two issues in mind, I added some directives to the icon's markup:

<i ng-show="enabled" ng-mousedown="reset()" class="fa fa-times-circle"></i>

Notice something odd? I'm using ng-mousedown instead of ng-click. The latter worked for me originally, but eventually I added a blur binding on the input element, and that interfered with clicking on the icon (the icon's visibility would be toggled without affecting the content). Since the mousedown event gets fired prior to the blur event, using ng-mousedown resolves the issue.

By updating scope.enabled I can toggle the icon's visibility. The scope.reset() function will handle the reset whenever the icon is clicked. The icon markup uses typical Angular directives, but on its own it's just markup. To get it to function as expected it needs to be compiled and given a scope. To achieve this I use the $compile service, which returns a linker function that takes the scope available from the directive's link function.

To illustrate how this fits into the overall directive, consider the following (incomplete) setup to get a sense of the structure thus far:

angular.module('app').directive('resetField', function($compile) {
  return {
    require: 'ngModel',
    scope: {},
    link: function(scope, element) {
      // compiled reset icon template
      var template = $compile('<i ng-show="enabled" ng-mousedown="reset()" class="fa fa-times-circle"></i>')(scope);
      element.after(template);
    }
  };
});

So far the directive uses an isolated scope and the link function gives us access to the scope and target element. The directive depends on $compile, and is limited to elements with an underlying model since it requires the ngModel controller. The icon markup is compiled with an isolated scope. Next, the compiled template is appended next to the target element.

To limit it to input elements I will test the element's nodeName. To access the element though, I need to access element[0] to get the actual DOM element rather than the wrapped jqLite/Angular version. I also want to limit it to input types that make sense to have this icon applied to (i.e., mainly text related fields, not radio buttons, or date fields that will be rendered differently by browsers). I can achieve this by inspecting the type property of the element's attributes. The link function's third parameter gives me access to the attributes (attrs below).

link: function(scope, element, attrs) {
  // limit to input element of specific types
  var inputTypes = /text|search|tel|url|email|password/i;
  if (el[0].nodeName !== "INPUT")
    throw new Error("resetField is limited to input elements");
  if (!inputTypes.test(attrs.type))
    throw new Error("Invalid input type for resetField: " + attrs.type);

Next, I'll add the logic that determines when to show or hide the icon. I want to show the icon when the element has content. Binding to the element's change event is the easiest way to handle this. Hopefully your app targets modern browsers which support the change event, otherwise you might need to resort to keyup and keydown type of events which can get a little messy when you want to detect changes to handle the delete/backspace/ctrl/shift keys. The change event takes the hassle out of all that and works intuitively.

To check whether the content is empty I could perform standard length checks on the element's value. Instead, I've opted to use the NgModelController.$isEmpty function which performs a few additional checks. I'll be needing the controller anyway for the reset functionality, so it isn't being brought in solely for this purpose. The link function's fourth parameter provides access to the NgModelController.

This gives us the following updated directive:

link: function(scope, element, attrs, ctrl) {
  /* limit to input element... */

  /* compiled reset icon template... */

  element.bind('input', function() {
    scope.enabled = !ctrl.$isEmpty(element.val());
  })

If the element gains or loses focus, I need to update the icon's visibility accordingly. I achieve this by binding to the focus and blur events. Since the focus changes don't affect the content I need force an update by calling $scope.apply(). In fact, Angular does just that under the covers when it handles the input event.

With these concerns in mind, the bindings now resemble the following:

element.bind('input', function() {
  scope.enabled = !ctrl.$isEmpty(element.val());
})
.bind('focus', function() {
  scope.enabled = !ctrl.$isEmpty(element.val());
  scope.$apply();
})
.bind('blur', function() {
  scope.enabled = false;
  scope.$apply();
});

The next piece of the puzzle is implementing the reset() function that gets called whenever the icon is clicked. This is the main part of the code that I changed a few times and wonder if there's a better way to pull off. The main challenge was that resetting the value directly, via element.val(null), wasn't affecting the model. In other words, the binding wouldn't kick in. Instead, I needed to use a pair of NgModelController functions to update the view (and model), then render the changes to the UI. Specifically, the $setViewValue() function updates the view's value (and ultimately the model's value), and the $render() function is responsible for actually updating the view (i.e., the UI gets updated).

After the UI update the focus is lost, so I use the $timeout service to reset it. A piece of advice I received at ng-conf 2014 was that I could get away with setTimeout for better performance since it wouldn't trigger a digest cycle. In other words, $timeout is useful if I have other changes that would benefit from triggering a digest and for testability. The good news is that according to the $timeout documentation I can still use it and avoid a digest by passing in false to the invokeApply parameter.

With these additions the directive resembles the following:

// add $timeout
angular.module('app').directive('resetField', function($compile, $timeout) {
  return {
    require: 'ngModel',
    scope: {},
    link: function(scope, el, attrs, ctrl) {
      /* limit to input element... */

      /* compiled reset icon template... */

      scope.reset = function() {
        ctrl.$setViewValue(null);
        ctrl.$render();
        $timeout(function() {
            el[0].focus();
        }, 0, false);
      };

At this point I've covered everything on my list of requirements and the final item is adding animations. I've decided to leverage the awesome Animate.css library. It provides a number of named CSS3 keyframe animations.

Since the icon uses ng-show, the Angular animation library allows us to plugin to the animation transitions through the ng-hide-* classes that are added when the ng-show value changes. To hook into these I'll add the fadeOut animation (from Animate.css) to the ng-hide-add class, and the 'fadeIn' animation for the ng-hide-remove class. For more details on Angular animations check out "Remastered Animations in AngularJS 1.2.".

A minor issue I ran into with the CSS was that I had to use display:inline to get this to appear smoothly, rather than the display:block suggested by the aforementioned blog post.

To include Animate.css and ngAnimate:

  <link href="//cdnjs.cloudflare.com/ajax/libs/animate.css/2.0/animate.min.css" rel="stylesheet">
  <script src="https://ajax.googleapis.com/ajax/libs/angularjs/1.2.7/angular-animate.min.js"></script>

The CSS needed to work with ngAnimate:

/* animations for ngAnimate */
input[reset-field] + .fa.ng-hide-add {
  display:inline!important;
  -webkit-animation: 0.3s fadeOut;
  -moz-animation: 0.3s fadeOut;
  -ms-animation: 0.3s fadeOut;
  animation: 0.3s fadeOut;
}
input[reset-field] + .fa.ng-hide-remove {
  -webkit-animation: 0.5s fadeIn;
  -moz-animation: 0.5s fadeIn;
  -ms-animation: 0.5s fadeIn;
  animation: 0.5s fadeIn;
}

Next, the ngAnimate module needs to be included:

angular.module('app', ['ngAnimate'])

With these pieces in place the icon now fades in when the input element has text or gains focus (when it's not empty) and fades out when the element becomes empty (while active) or loses focus.

The complete directive looks like this:

angular.module('am.resetField', []).directive('resetField', ['$compile', '$timeout', function($compile, $timeout) {
  return {
    require: 'ngModel',
    scope: {},
    link: function(scope, el, attrs, ctrl) {
      // limit to input element of specific types
      var inputTypes = /text|search|tel|url|email|password/i;
      if (el[0].nodeName !== "INPUT") {
        throw new Error("resetField is limited to input elements");
      }
      if (!inputTypes.test(attrs.type)) {
        throw new Error("Invalid input type for resetField: " + attrs.type);
      }

      // compiled reset icon template
      var template = $compile('<i ng-show="enabled" ng-mousedown="reset()" class="fa fa-times-circle"></i>')(scope);
      el.after(template);

      scope.reset = function() {
        ctrl.$setViewValue(null);
        ctrl.$render();
        $timeout(function() {
            el[0].focus();
        }, 0, false);
      };

      el.bind('input', function() {
        scope.enabled = !ctrl.$isEmpty(el.val());
      })
      .bind('focus', function() {
        scope.enabled = !ctrl.$isEmpty(el.val());
        scope.$apply();
      })
      .bind('blur', function() {
        scope.enabled = false;
        scope.$apply();
      });
    }
  };
}]);

I spoke with Dave Smith at ng-conf 2014. He gave a nice "Deep Dive into Custom Directives" session and kindly accepted to code review my directive to see if I could make improvements. Replacing $timeout with setTimeout was one of those suggestions, which I covered earlier. One of the interesting suggestions he made was to turn this into a component instead, which would allow me to get rid of the $compile step and get rid of the NgModelController calls made in the reset(), perhaps by a direct element.val(null) call instead.

The feedback was much appreciated and I might try my hand at that next. I suppose that approach might allow me to remove the input type checking as well, since the usage of the component leaves no room for ambiguity, or I can still apply the type via attributes.

Be sure to check out my GitHub repo where I have a demo setup of the directive along with a suite of Karma/Jasmine tests.

If you've got any code improvement suggestions, especially around the reset functionality, your feedback is welcome!


Writing AngularJS controllers with CoffeeScript classes

When I started using AngularJS one of the obstacles I ran into was using CoffeeScript classes to develop the controllers. Most examples show an inline JavaScript function, which I can easily duplicate with CoffeeScript. However, to make use of a CoffeeScript class, I had to play around with it till I figured it out.

In this post I'll provide a look at converting the simple Todo app on the Angular page to CoffeeScript. I'll cover the process I went through while figuring this out, which includes:

  1. A 1:1 JavaScript to CoffeeScript conversion using functions
  2. Using a CoffeeScript class with all functions defined in the constructor, off of $scope (don't do this)
  3. Defining methods on the class instead of on $scope and assigning the class to the $scope (good)
  4. Using the new Angular 1.1.5+ controller as syntax and an example of CoffeeScript using a class and base class (good)

Original Todo App

To begin with, familiarize yourself with the original Angular Todo app written in JavaScript:

JS Bin

1:1 Conversion to CoffeeScript

When using CoffeeScript the output is typically generated within an anonymous function to avoid polluting the global namespace (unless you're using the bare compilation option). This poses a challenge when converting the example from JavaScript to CoffeeScript. When doing so, you'll likely run into this error: Argument 'TodoCtrl' is not a function, got undefined

To address this issue:

  1. Add a module name for the Angular application: <html ng-app="todoApp">
  2. Add the controller to the todoApp module in the CoffeeScript file:
angular.module("todoApp", [])
  .controller("TodoCtrl", TodoCtrl)

The following JS Bin shows the 1:1 conversion result.

JS Bin

Using a CoffeeScript class with Methods on $scope

Great, we now have CoffeeScript code! To use a CoffeeScript class the first thing to figure out is how to use Angular dependency injection (DI). The answer is to pass everything as constructor parameters, as follows:

class TodoCtrl
    constructor: ($scope) ->
        $scope.todos = [
            text: "learn angular"
            done: true
        ,
            text: "build an angular app"
            done: false
        ]

Once you do that, you run into another error: Uncaught ReferenceError: $scope is not defined todo.js:23

It turns out all the methods being defined on $scope cause that error since $scope isn't defined. You could solve this by moving all the function definitions off of $scope into the constructor.

JS Bin

This approach isn't recommended. It's not ideal and isn't making use of the CoffeeScript class. We'll fix that next.

Improved CoffeeScript Class Without Relying on $scope

To leverage a proper class we need to define the functions on the class instead of on the $scope. Here are the changes I've made to the HTML and CoffeeScript files to facilitate this:

  1. Assign $scope to the class in the constructor. This is done by using the @ prefix: constructor: (@$scope) ->
  2. For now I've kept the todos array hanging off of $scope, which means we would need to refer to it via @$scope in all methods. That's why step #1 was done.
  3. Change all $scope methods to class methods

As soon as that's done we run into two issues:

  • Issue: archive functionality breaks. To fix it we need to use a fat arrow in the angular.forEach to maintain the proper scope or rewrite the loop. The former looks like this:

      archive: ->
          oldTodos = @todos
          @todos = []
          angular.forEach(oldTodos, (todo) =>
              @todos.push(todo) unless todo.done
          )
    
  • Issue: all methods bound to in HTML are hanging off $scope so they don't render to the page. The remaining count is missing and the text appears as "remaining of 2". The addTodo method is broken too. We need a way to access the controller methods and this is done by assigning the controller to the $scope in the constructor and updating the template to access the methods from the controller. Thus, we prefix all methods with ctrl., e.g., ctrl.remaining() (same for archive and addTodo).

    constructor: (@$scope) ->
    # todos here
    $scope.ctrl = @
    

Here's the full JS Bin sample of this approach:

JS Bin

CoffeeScript Class, Base Class, and Controller As Syntax

The controller as syntax was introduced in Angular 1.1.5, and it allows us to achieve the same result as assigning the controller to the scope. Rather than doing so in the CoffeeScript file, we can move it to the markup which makes it much more readable.

In this final example I've made the following changes:

  • Changed Angular library to 1.1.5+
  • Moved todos array and todoText to the class and update their template references (no more $scope reliance, except to log it to the console)
  • Used Controller as syntax and updated template to prefix ctrl. as needed
  • Introduced a BaseCtrl which the TodoCtrl will inherit from to make use of the toJson base method
  • Added a textarea bound to the base toJson method
  • Applied DI via the $inject approach to address minification concerns

JS Bin

CoffeeScript and ng-min Incompatibility

Unfortunately if you used to depend on ng-min to convert the inline function DI approach to bracket notation it will no longer work with CoffeeScript classes. To address this you should use the $inject property instead, which I demonstrated in the final example above.


Previous Posts